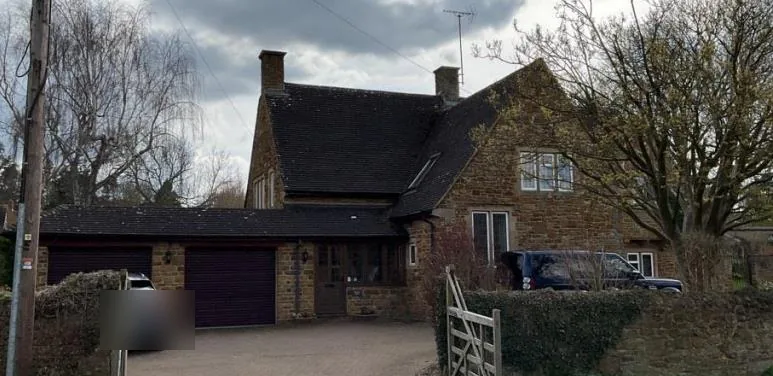
At a glance
- Property — detached two-storey house, Barford St Michael, near Banbury (conservation area, not listed)
- Era — built c. 1969–70 in the local stone vernacular; garage and porch added c. 1997
- Construction — rubble-stone outer leaf, concrete-block inner leaf, irregular unfilled cavity (~410 mm overall); solid floors; sloping first-floor ceilings
- Heating before — ageing oil boiler (~70% efficiency at best), external oil tank, 162-litre cylinder; estimated 48,300 kWh of fuel a year (design-stage estimate)
- Works delivered — full electrical renewal · whole-house humidity-controlled ventilation · new windows and doors · insulated stone-mullion surrounds · sloping-ceiling insulation · room-by-room internal wall insulation · oil-to-heat-pump conversion with excavated, insulated pipework
- Duration — around six months on site, delivered as one coordinated programme
- Result — EPC B, certified December 2023 (public register)
The building and its problem
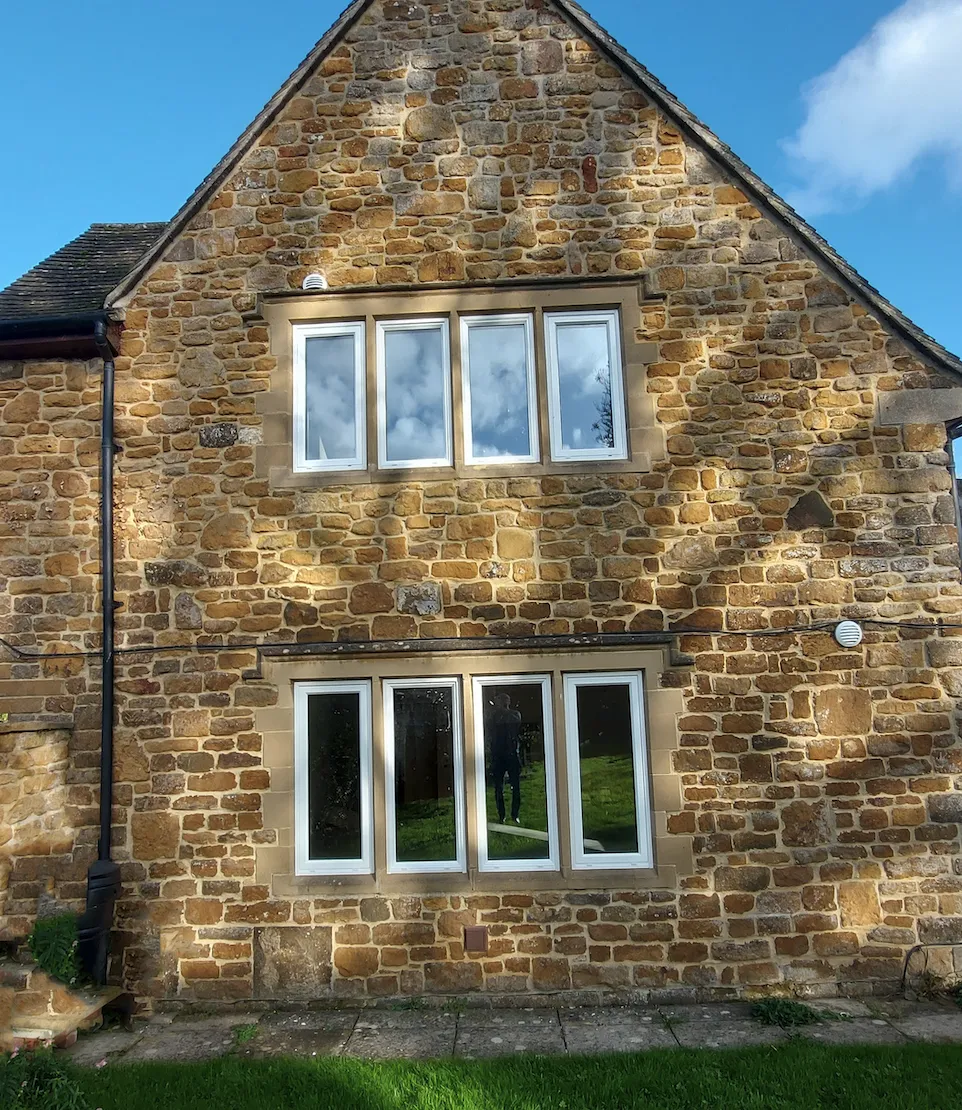
Orchard House was built around 1969–70 to sit comfortably among neighbours two centuries older: honey-coloured rubble limestone, steep roofs, and mullioned window surrounds in reconstituted stone. It looks like a village house. It was built, though, with the thermal expectations of its own decade.
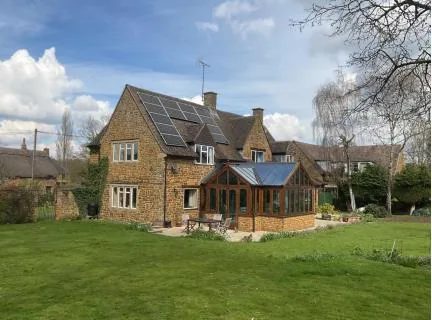
Beneath the traditional surface, the construction is a hybrid — a rubble-stone outer leaf and a concrete-block inner leaf across an irregular cavity of roughly 410 mm overall. That is neither a true solid stone wall nor a regular modern cavity wall, and it behaves like neither. Ground floors are solid concrete. Much of the first floor is wrapped not by the loft but by skeilings — sloping ceilings that follow the rafters — with very little insulation behind them, even though the main loft had been topped up to around 300 mm.
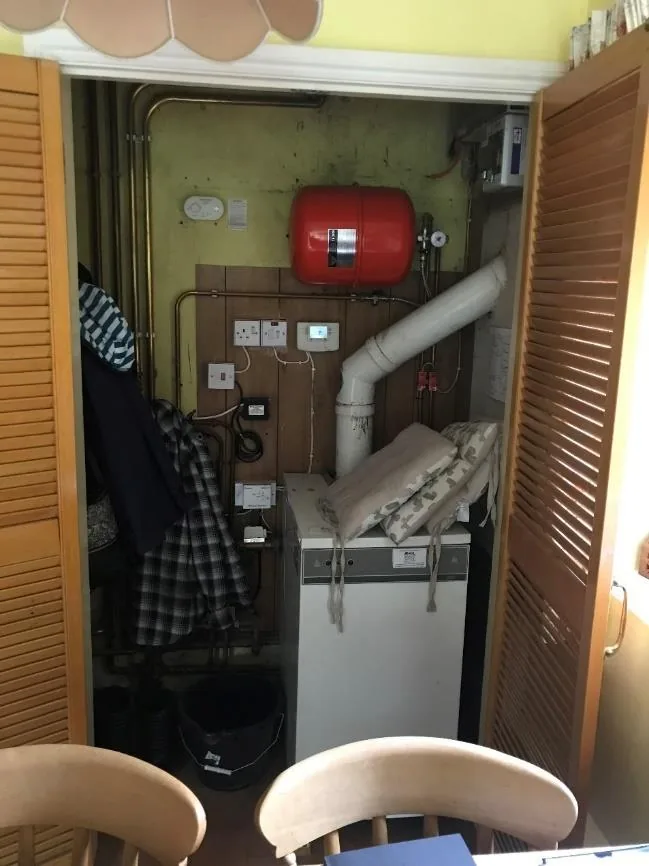
Heat came from an ageing oil boiler in a kitchen cupboard, running at no better than about 70% efficiency, fed from an external tank, with a 162-litre cylinder upstairs. The design-stage estimate put annual heating fuel use at roughly 48,300 kWh. Distribution pipework ran through the uninsulated solid floor — old underfloor heating pipes were, in effect, warming the ground.
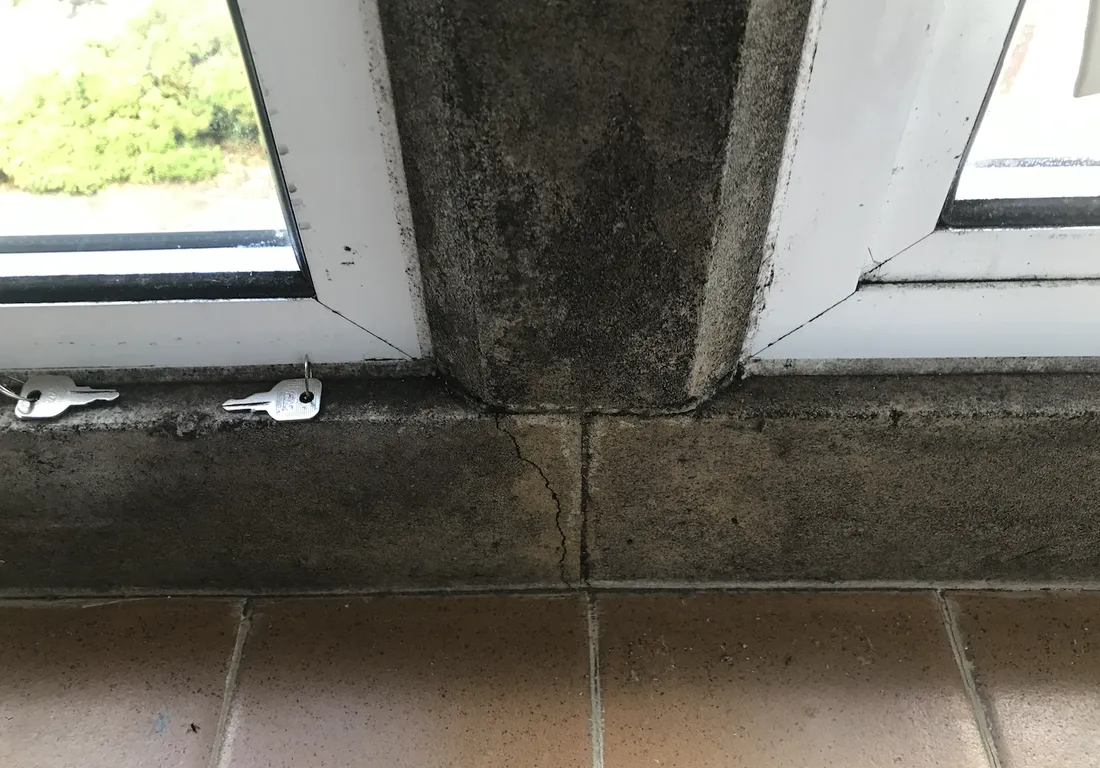
Air leakage was measured, not assumed: a pre-works pulse test recorded air changes per hour at 4 Pa ranging from 1.4 in the large sitting room to 5.6 in one bedroom — a pre-works baseline, and a picture of a house leaky in the wrong places yet with no deliberate background ventilation at all. Condensation at the uninsulated stone mullions had already produced mould and staining at window reveals.
The owners’ brief grew from values rather than payback: end the dependence on oil, make the house warm and healthy, and do the work once, properly.
Why the obvious answers were wrong
Two standard responses exist for a cold cavity-walled house, and both failed here.
Cavity fill was ruled out. An irregular rubble-stone cavity cannot be filled predictably — voids, ledges and debris mean fill cannot be relied upon to be continuous, and current guidance treats such hybrid walls as solid walls for insulation purposes. Fill that only partly succeeds is worse than none: it creates cold spots and moisture paths you can no longer see.
External insulation was rejected. Wrapping the house would have buried the stone elevations that justify its place in the village streetscape — a conservation-area setting where the external appearance was to be preserved.
What remained was the harder, better route: rebuild the thermal envelope from the inside, room by room, in materials that respect how masonry manages moisture — and coordinate the insulation with new windows, ventilation, heating and electrics so that each measure makes the next one possible. The sequence was fixed before any product was: services first, openings next, fabric after, heat last, so the heat pump would be sized against the building it would actually serve. This is what our whole-house retrofit service exists to do.
The works
Internal wall insulation — breathable, room by room
Every external wall inside the thermal envelope was stripped back to sound masonry — wallpaper, gypsum and cementitious finishes removed, because impermeable layers had no place in the new assembly. The masonry was levelled with a lime parge coat of at least 8 mm and allowed to dry.
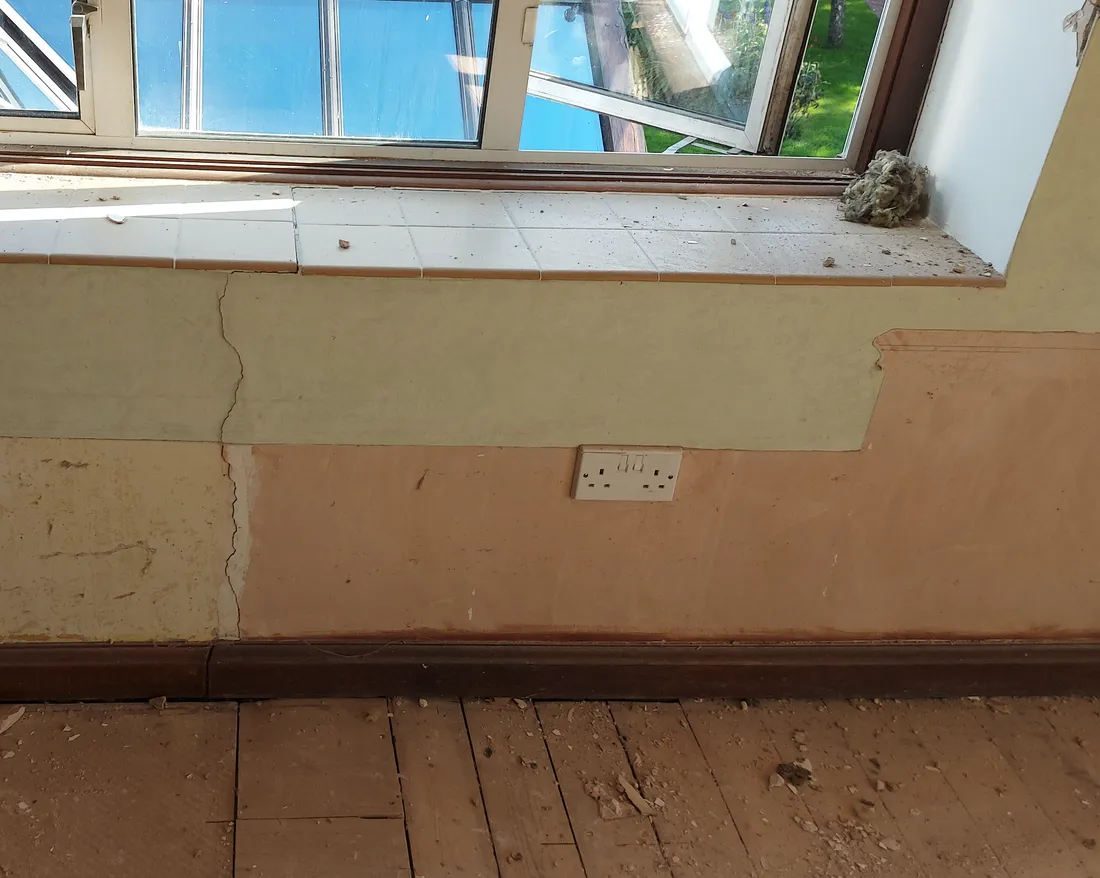
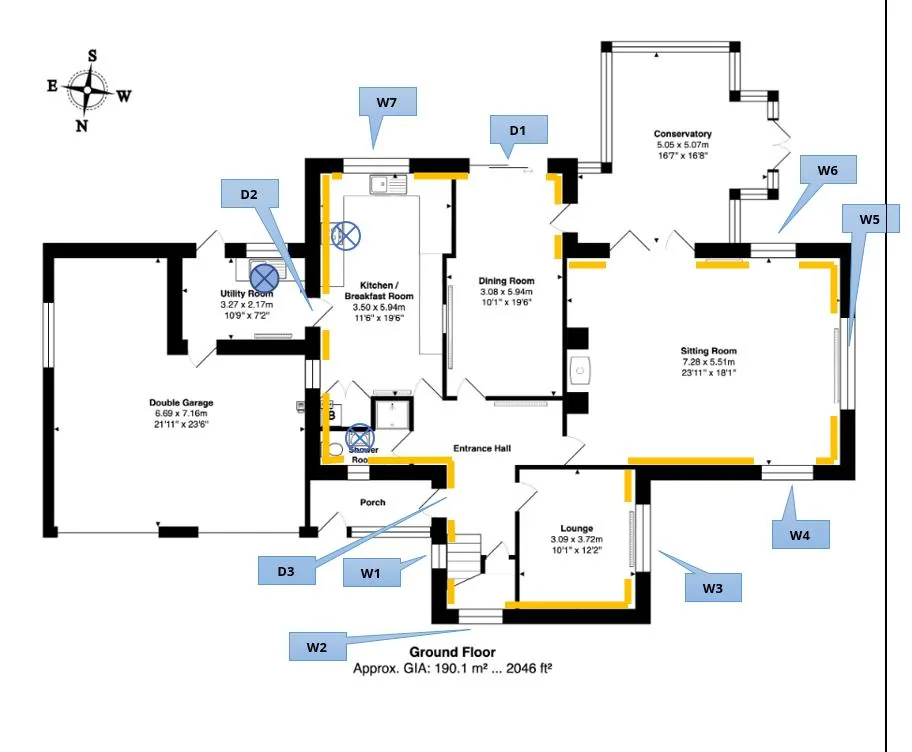
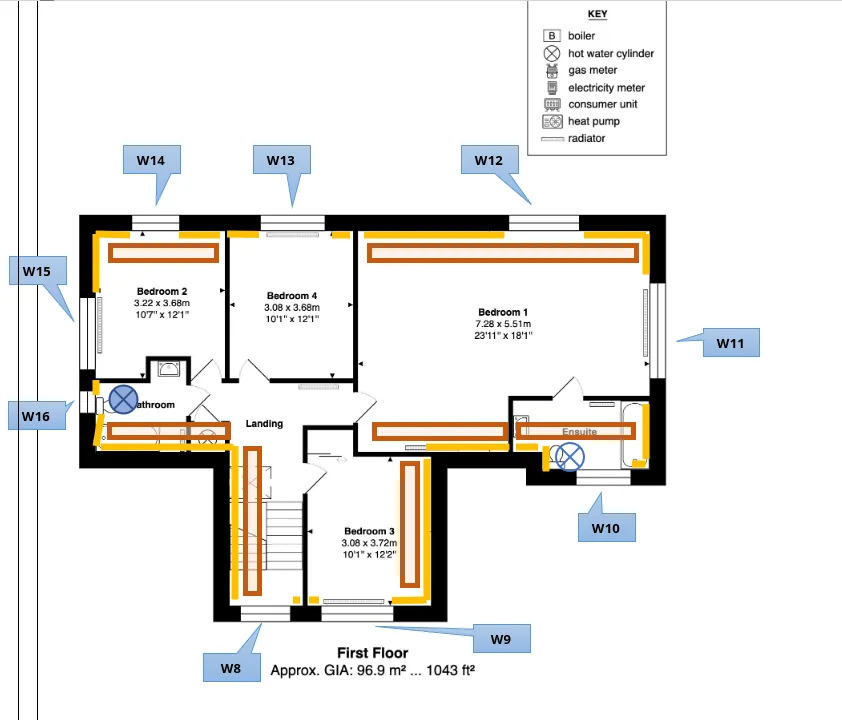
The insulation itself was specified room by room rather than as one universal board: wood-fibre boards of 30–60 mm where depth allowed, a 40 mm profile in the small sitting room to protect floor area, cork with lime plaster in the wet rooms, and calcium-silicate board among the compatible options. Boards were bedded in lime adhesive with mechanical fixings, pressed home so no air pocket remained behind them — a void behind an insulation board is a highway for moist air. Where radiators or joinery would later hang, structural pattresses were bonded to the masonry first, so no fixing would ever bridge the warm layer into the cold wall.
Continuity was the discipline. Where a partition met an external wall, the insulation returned at least 400 mm along it. Where the first-floor structure interrupted the wall, the layer continued through the floor void. Wardrobes standing against external walls got insulation behind them — a wardrobe on a cold wall is a mould incubator. Window reveals received thin insulated returns of their own, so the warm layer wraps each opening instead of stopping at its edge. Airtightness tapes sealed reveals, perimeters and every service penetration before a mesh-reinforced lime plaster rebuilt the surface, finished in highly vapour-open paint (quoted Sd ≤ 0.1 m). The full method is described on our internal wall insulation page.
The moisture logic runs through all of it: every layer — parge, wood fibre or cork, lime plaster, paint — stays vapour-open and capillary-active, so the wall keeps doing what stone walls have always done: absorb, buffer and release moisture rather than trapping it. The moderate 30–60 mm range is deliberate too — current conservation research finds that moderate internal insulation captures most of the benefit at much lower moisture risk than aggressive build-ups. The design target for the upgraded walls was a U-value of around 0.3–0.4 W/m²K — a design target, not a claimed measured result.
Skeiling insulation — the hidden slopes above every bedroom
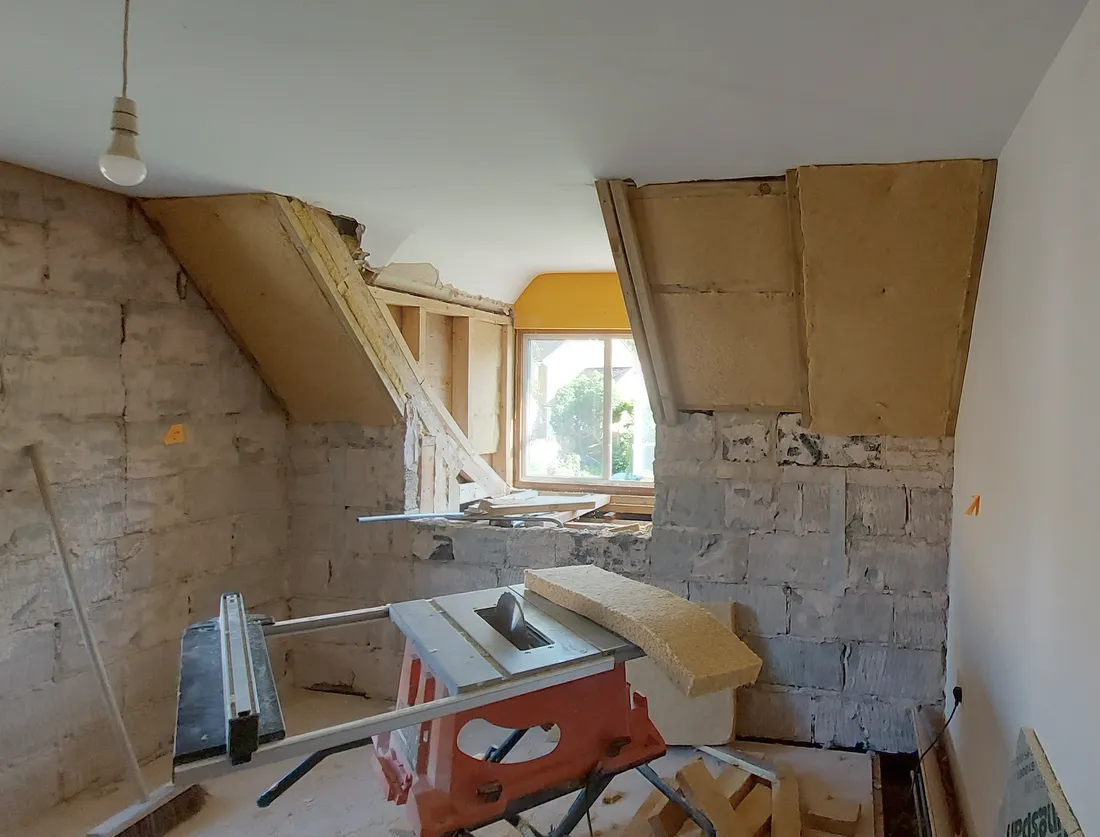
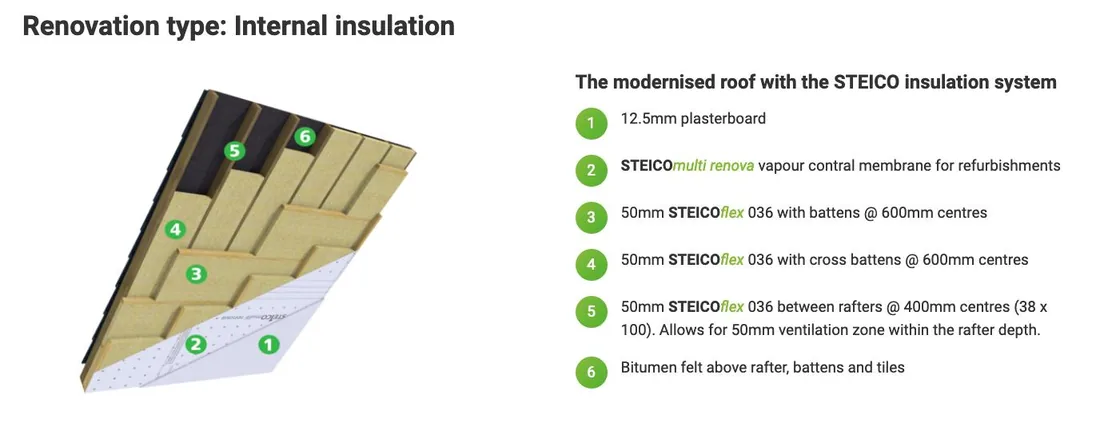
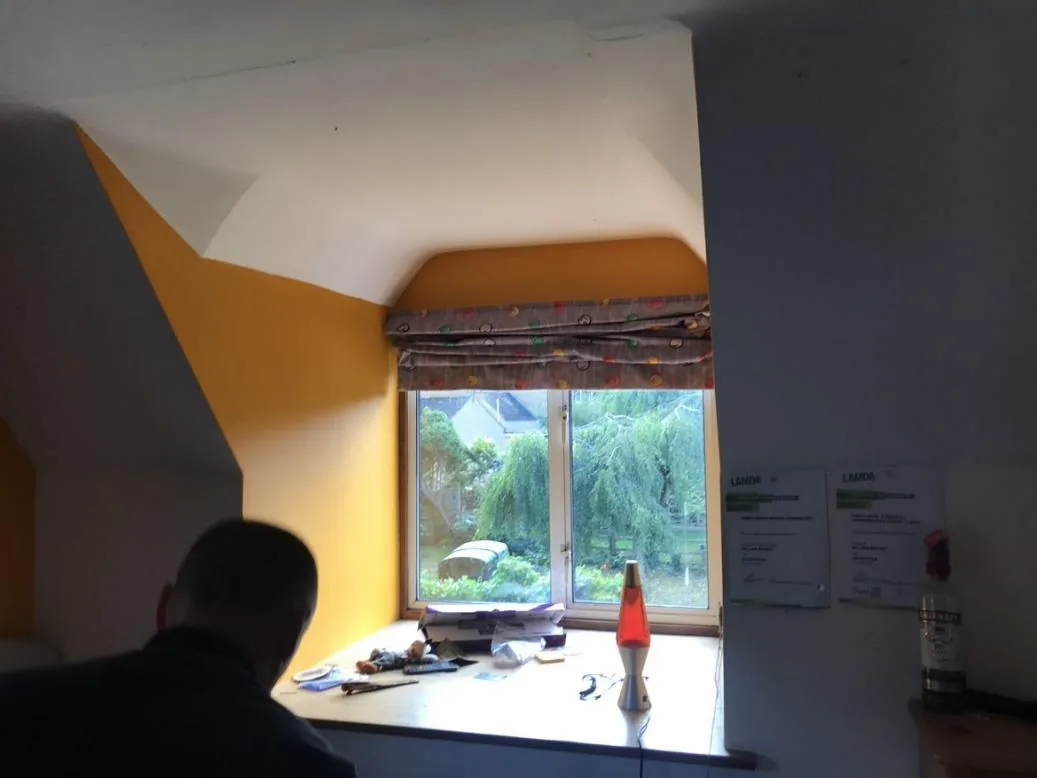
Nine separate sloping-ceiling zones — about 28.1 m² across the master bedroom, en-suite, front and rear bedrooms, family bathroom, airing cupboard and landing — were opened up: plasterboard off, wood-fibre insulation fitted between the rafters, with a continuous 50 mm ventilation zone preserved within the rafter depth above the insulation so the roof can keep breathing. Vapour-control junctions were taped airtight, boards adhered around their full perimeter (dot-and-dab was explicitly ruled out), bathroom-rated board used in the en-suite, and the loft ventilation reviewed. Each zone was inspected before it was re-lined and skimmed — work concealed is work verified first. More on this kind of work: loft, room-in-roof and skeiling insulation.
Windows and the stone-mullion junction
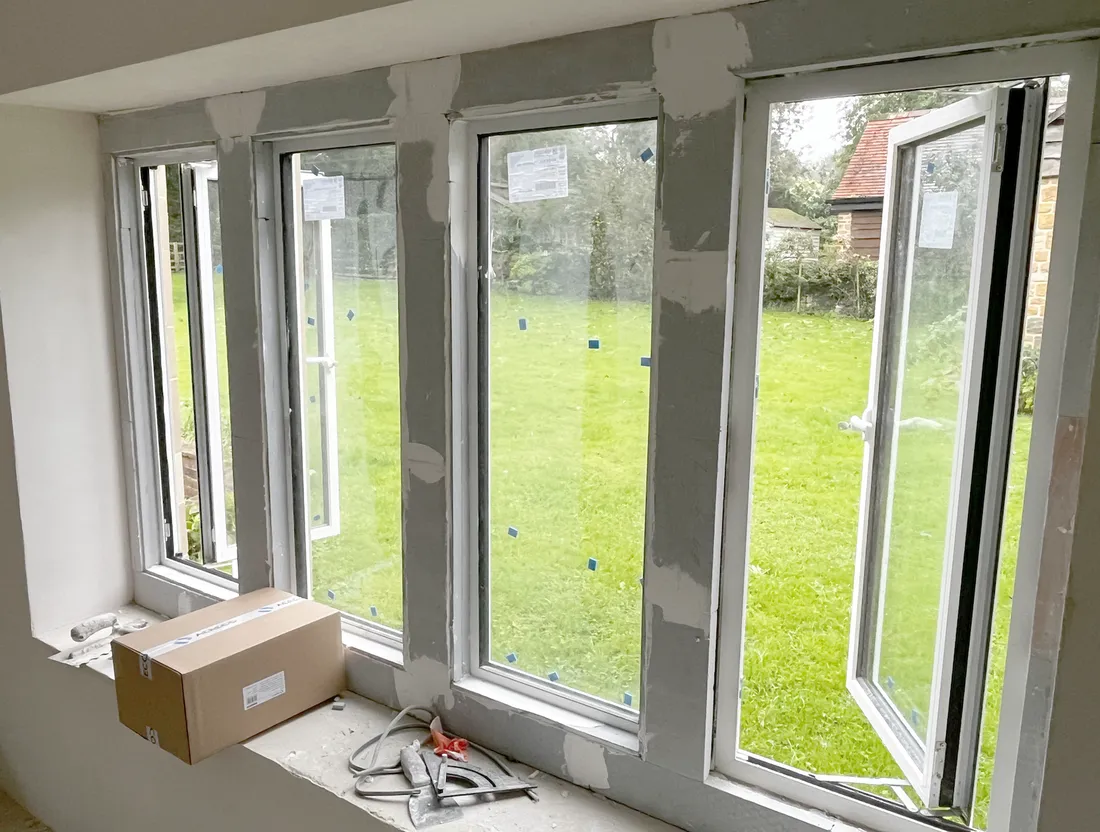
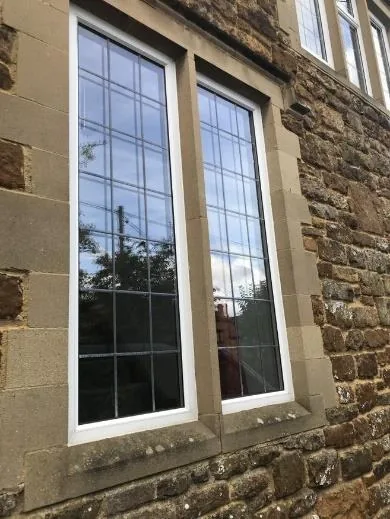
The house has two families of openings and the project treated them differently. The large rear and side openings — kitchen, patio doors, bedroom casements, utility — took robust double-glazed PVCu units with warm-edge glazing. The stone-mullioned openings demanded something finer: bespoke slim-frame aluminium units, sized so the frames read as slender as the originals within the dressed-stone surrounds. The design target for the new windows was a whole-window U-value of roughly 1.0–1.4 W/m²K. See our approach to windows and doors, including slim-frame heritage units.
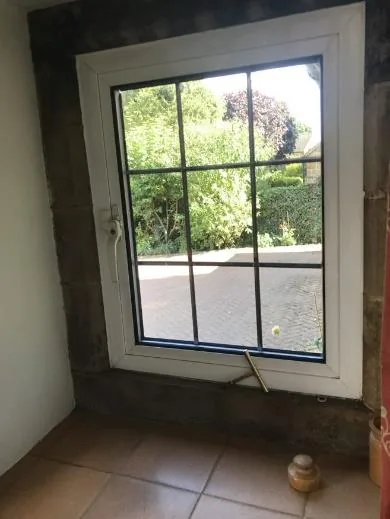
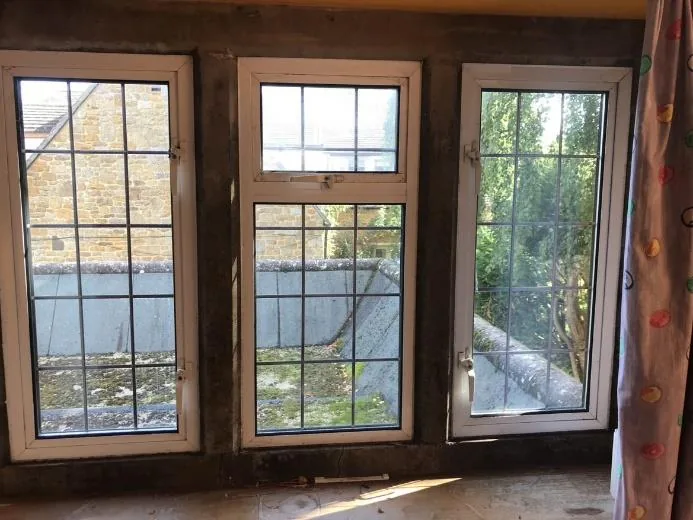
The mullions themselves were the house’s weakest detail: uninsulated reconstituted stone bridging straight through the wall, condensing, growing mould. Specialist stonemasons were consulted; damaged surrounds were repaired, and the stone reveals were insulated internally with thin calcium-silicate board — done concurrently with the wall insulation so reveal, tape, plaster and wall build-up meet as one junction. Every frame was sealed to its opening with pre-compressed impregnated tape, linking weather seal, insulation and airtight layer in a single detail.
Whole-house ventilation — designed, not hoped for
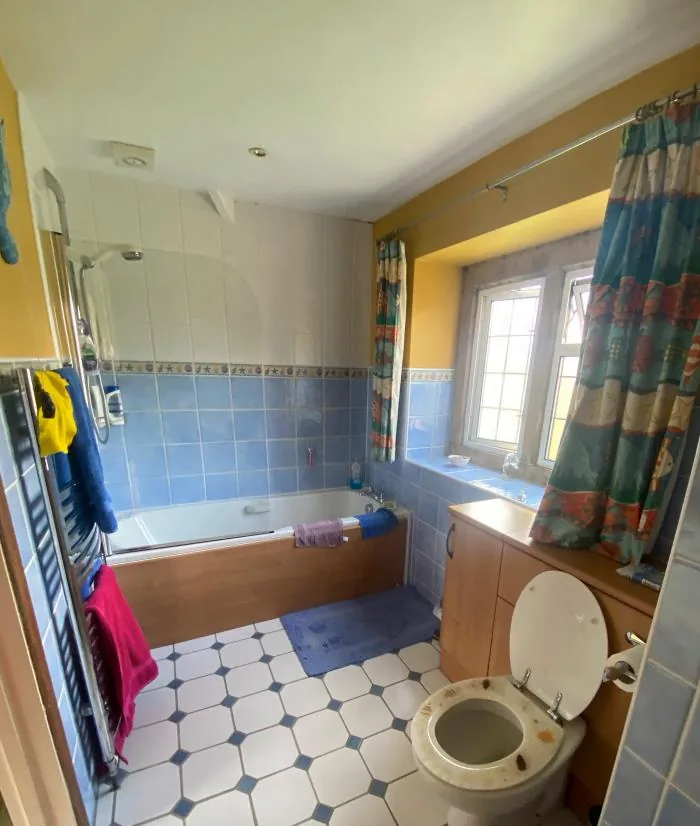
Make a house deliberately less leaky and moisture needs a planned exit. The answer was humidity-controlled whole-house extract ventilation: extraction where moisture is made — kitchen, ground-floor shower room, both first-floor bathrooms and the utility area — with planned background air to habitable rooms and transfer paths and door undercuts connecting the two. The background-air decision was settled before the windows went into production, so inlets were designed into the fabric rather than bored through it afterwards. Wet-room windows carry no trickle vents at all: their air leaves through the extract terminals, under control. The system responds to humidity — rising when bathrooms and kitchen are in use, falling to a quiet background level otherwise — and was commissioned and explained to the owners at handover. This is our smart whole-house ventilation service in action.
From oil to an air-source heat pump
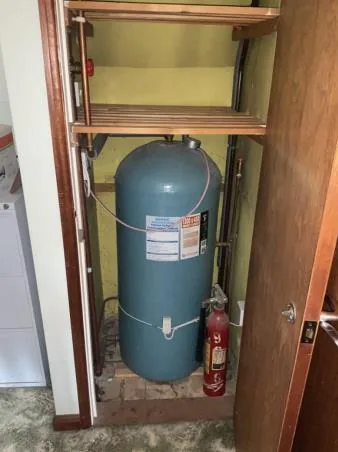
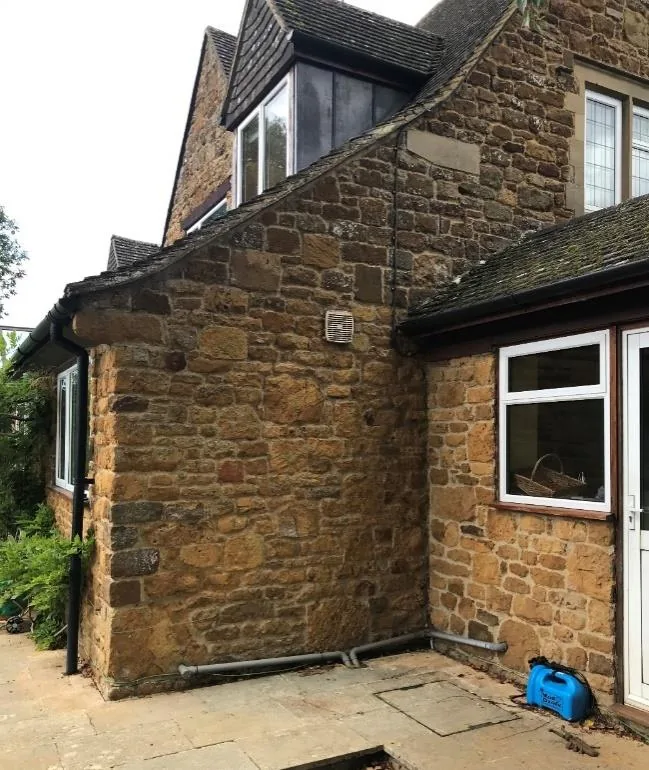
The oil boiler, the 162-litre cylinder and the external tank all left the site. In their place: an air-source heat pump on a prepared base beside the east kitchen wall, with substantially larger insulated hot-water storage (a 17 kW unit and approximately 300-litre cylinder were referenced at design stage), filtration, antifreeze protection, flow measurement and modern controls.
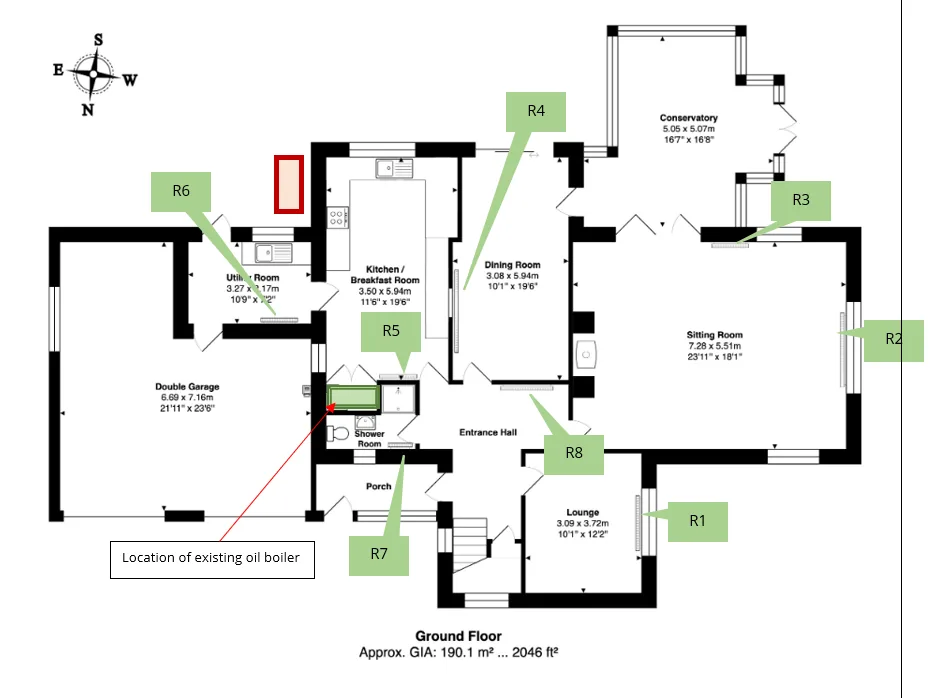
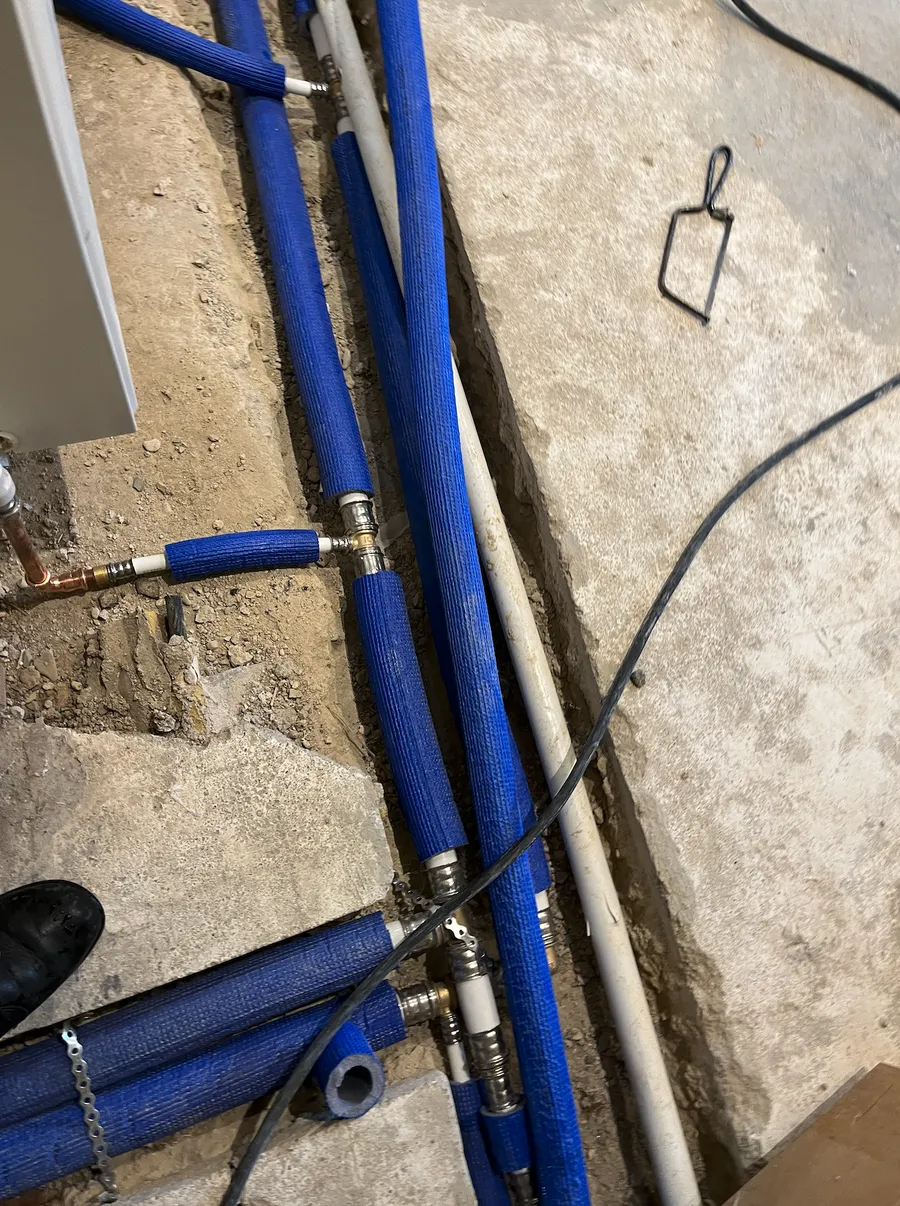
Crucially, the heat pump was designed last, against the improved envelope — room-by-room heat losses calculated on post-retrofit values, all sixteen existing radiators photographed, logged and checked against low-flow-temperature output, and replaced only where they would fall short. Below the floors the change was more radical: the old distribution pipework running through the uninsulated slab was abandoned, channels were excavated across the floor, and new insulated runs laid and re-buried — the heat now travels to the rooms, not the earth. The conservatory’s existing wet underfloor heating was connected into the new system, and registration, notification and commissioning duties completed. Read how we sequence heat pumps and heating and hot water after fabric.
Full electrical renewal — the enabling works nobody photographs
Electrical work came first in the sequence, not last. The consumer unit and solar-PV controller were relocated to the garage; degraded wiring was replaced; the kitchen’s circuits were separated and rebuilt; smoke and heat alarms, downlights, sockets and data cabling were installed; and dedicated supplies run for the heat pump and ventilation — all tested and Part P registered. The detail that tells the story is the smallest: back boxes specified deep enough for the 60 mm insulation zones, so sockets sit cleanly on the new wall build-up without crushing or piercing it. See rewiring and electrical.
What we used and why
- Wood-fibre board — walls and rafter zones: vapour-open and capillary-active, it insulates while letting the masonry wall keep absorbing and releasing moisture, with good decrement delay in the roof slopes
- Cork with lime plaster — wet rooms: naturally moisture-tolerant in the highest-humidity rooms, in a fully breathable build-up
- Lime (parge, adhesive, plaster) — every insulated wall: levels rough masonry, bonds the boards, and forms a continuous, repairable, vapour-open air-control layer — no gypsum, no cement
- Calcium-silicate board — stone-mullion reveals and slim build-ups: thin, capillary-active and mould-inhibiting — the right tool where depth is scarce and condensation risk is highest
The result
Around six months on site — honestly longer than first hoped as the scope expanded, with the owners away for the five most intensive months and home for Christmas. In December 2023 the house was certified EPC B (public register) — a striking rating for a 1970 stone house that was heated by oil a year earlier. From the street, nothing has changed: the stone, the mullions and the roofline read exactly as before. The retrofit is in the performance, not the appearance.
“We didn’t start this project to save money on energy bills. We did it for long-term environmental sustainability… What’s more important to us is knowing that Orchard House will stand as our contribution to reducing carbon emissions. It’s also now a cosy home to live in.” — the homeowners
“Despite the disruption, it was undoubtedly worth the journey. We’re thrilled with the results. The house now feels modern, warmer, and more welcoming than ever.” — the homeowners
Their advice to anyone considering the same journey: “You really have to go into a project like this with your eyes wide open.”
Questions we’re asked
Why couldn’t the cavity walls just be filled with insulation?
The cavity is irregular — a rubble-stone outer leaf over a concrete-block inner leaf, with voids and ledges across roughly 410 mm. Fill cannot be relied upon to be continuous in a wall like this, and current guidance treats such hybrid walls as solid walls for insulation purposes. Partial fill would have created hidden cold spots and moisture paths, so the envelope was rebuilt from the inside instead.
Why use wood fibre, cork and lime instead of modern foam insulation?
Stone and masonry walls manage moisture by absorbing and releasing it. Wood fibre, cork, calcium silicate and lime are vapour-open and capillary-active, so the insulated wall can still dry out rather than trapping moisture behind an impermeable layer — the failure mode that gives internal insulation a bad name when it is done with the wrong materials.
Does an air source heat pump work in an older stone house?
Yes — if the fabric is improved first and the system is designed against the improved envelope. At Orchard House the heat pump was sized only after the insulation works, using room-by-room heat-loss calculations, with radiators checked and replaced where needed for low flow temperatures and new insulated pipework laid in the excavated floor. The house was certified EPC B in December 2023.
How long does a whole-house retrofit take?
Orchard House took around six months on site, delivered as one coordinated programme — electrics first, then ventilation routes, windows, insulation, and finally the heat pump. The owners stayed elsewhere for the five most intensive months. Honest programmes are part of doing this properly: deep retrofit is disruptive, and it is worth going in with eyes wide open.
For architects — technical footnote
Design targets from the project record: upgraded external walls 0.3–0.4 W/m²K; new windows (whole-window) 1.0–1.4 W/m²K; insulated stone-mullion reveals and skeilings designed to comparable targets. These are design targets, not measured post-completion values; the certified outcome is the EPC B (December 2023, public register). Pre-works airtightness was measured by pulse test at 1.4–5.6 ach @ 4 Pa by room (baseline only; no post-completion test is claimed). The moisture strategy — vapour-open build-ups (finish Sd ≤ 0.1 m), continuous lime plaster as the air-control layer, taped critical junctions, moderate insulation thicknesses — follows the direction of current Historic England guidance on internally insulating traditional and hybrid masonry. Ventilation was designed within the Approved Document F framework (whole-dwelling, extract and purge, with commissioning and occupant handover); heat-pump design followed MCS-style room-by-room heat-loss calculation, emitter verification against design flow temperature, and documented commissioning, with electrical works tested and Part P registered. Thermal-envelope boundaries (porch, utility, garage and conservatory excluded), junction details — 400 mm partition returns, floor-void continuity, insulated reveals, structural pattresses — and the trade sequence are all recorded in the project documentation and can be walked through on request.